

End Cap
Retaining Ring
Secure Seal
Skip to product information
In stock
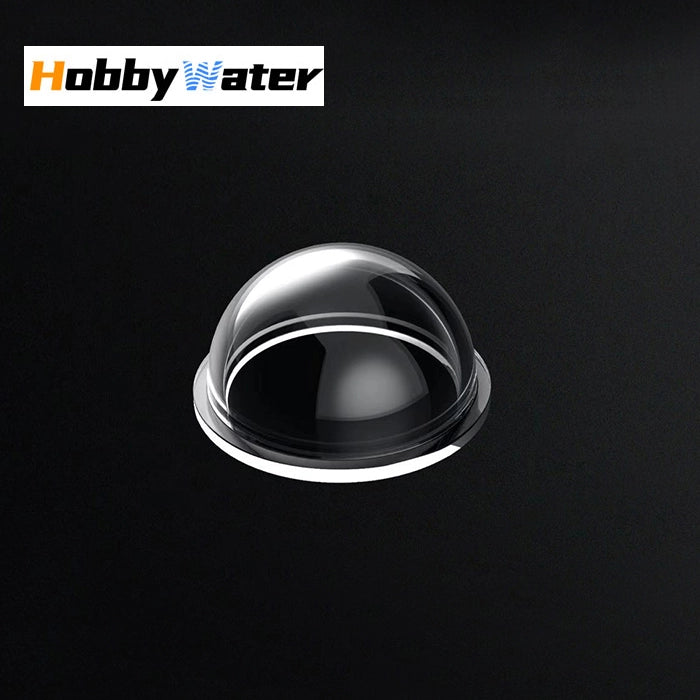
10MPa Optical PC Dome Lens 110mm for Underwater ROVs - 1000m Depth 1 piece
$26.99 USD
Customization Service
We are the OEM ODM manufacturer. For bulk orders and custom solutions, please contact us at official@hobbywater.com
When will I get my order?
We prioritize fast order processing. For in-stock items, orders placed before 4:00 PM (Beijing Time) will be shipped the same day. Standard orders typically ship within one week, while customized orders require approximately 15-30 business days for production and delivery. Delivery times may vary under special circumstances.
Shipping Methods
We ship to most countries worldwide. However, please ensure compliance with your local import regulations.
- For the USA: We offer tax-inclusive shipping options. Expedited orders are shipped via DHL, UPS, or FedEx. Note: DHL does not allow undervaluation.
- For other countries: Tax-inclusive shipping is available upon request. Otherwise, orders will be shipped via 4PX by default.
For specific shipping requirements, please contact us in advance.
10MPa Optical Polycarbonate Dome End Cap for Underwater ROVs
Product Features:
✔ 1000m (10MPa) depth rating
✔ High-transparency optical PC material
✔ Hydrodynamic dome shape reduces drag
✔ Wider field of view than flat lenses
✔ Pre-installed retaining ring for easy sealing
✔ Impact-resistant design (test certified)
✔ Compatible with most underwater cameras
✔ Works with camera pan-tilt systems
Technical Specifications:
- Material: Optical-grade polycarbonate
- Pressure Rating: 10MPa (1000m depth)
- Impact Test Certified (see below)
- Installation: Simple sealing mechanism
- Design: Streamlined hemispherical shape
Explosion Proof Test Certification:
Test Methodology:
- Used 5kg cylindrical hammer (85mm diameter × 124mm height)
- Dropped from 1m height onto dome surface
- Free-fall impact test with zero initial velocity
- Successfully passed all impact requirements
Applications:
- Underwater ROV camera housings
- AUV optical systems
- Marine research equipment
- Underwater inspection robots
- Subsea monitoring devices
Why Choose Our Dome Lens?
- Superior pressure resistance for deep-sea operations
- Maintains optical clarity at depth
- Reduced hydrodynamic drag for better vehicle performance
- Easy installation with reliable sealing
- Rigorously tested for impact resistance
Note: For optimal performance, please ensure proper installation and sealing procedures are followed when using in high-pressure environments.
Rovmaker 10Mpa Optical PC Dome End Cup of Underwater ROV Dome Lens
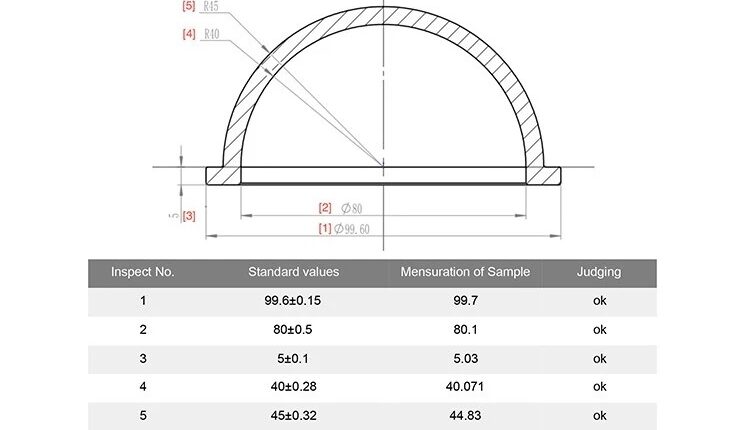
Specification
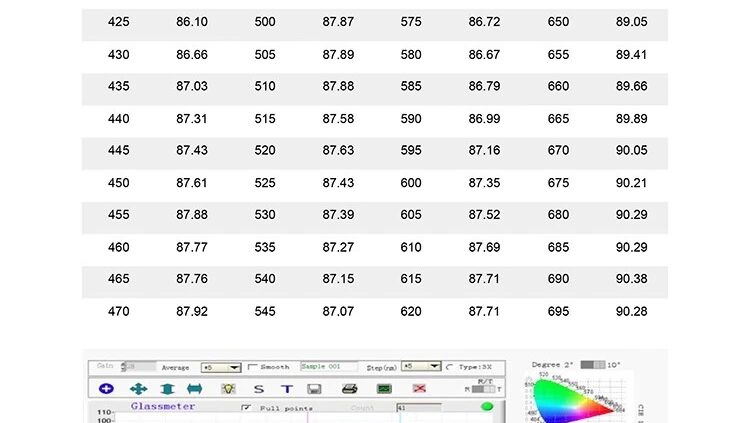
Optical Transmissivity Report
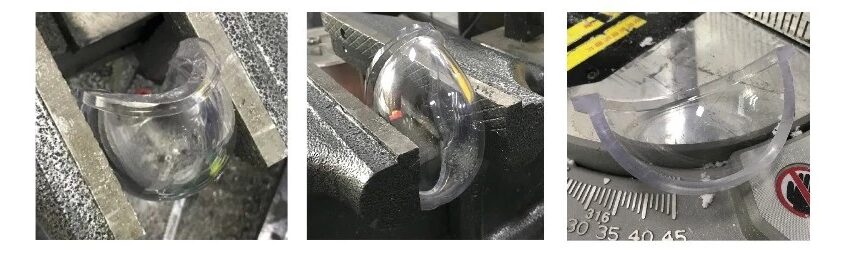
Extrusion Test Report
No cracks after intense deformation(After radial compression of 50 percent).


What are the different part configurations for the chamber assembly, and do they need grease?
Option 1 – One dome + one end cap (assembled):
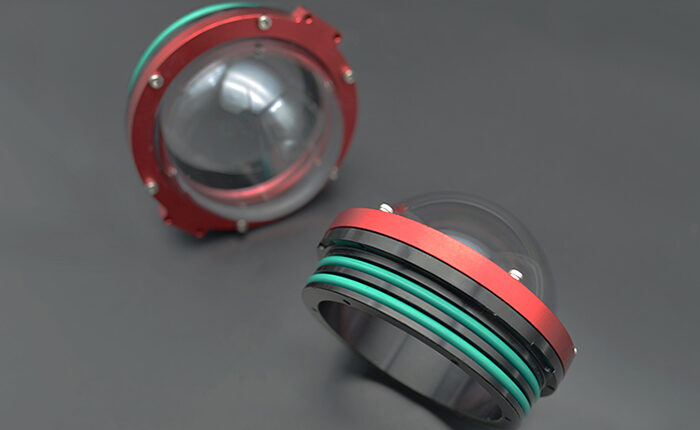
- 1x Hemisphere dome, 1x Chamber tube, 1x Flange, 1x End cap, 1x End cap retaining ring
Option 2 – One dome + one end cap (all separate parts):
- 1x Single dome, 2x Flanges, 2x End cap retaining rings, 1x Chamber tube, 1x End cap
Both Option 1 and Option 2 require 1x Dow Corning grease.
Option 3 – Two end caps:
- 1x Chamber tube, 2x Flanges, 2x End caps, 2x End cap retaining rings
Option 3 does NOT need grease.

Sealed Chamber · Installation SOP

Image unavailable. Please follow the text steps below.
1. Chamfer the Inner Edge
FILE
Use a file to grind a 1–2 mm chamfer on the inner circumference of the acrylic tube.
Purpose: Enables smooth flange insertion and prevents damage to the sealing ring.
›
Use a fine-tooth file. Apply even pressure to achieve a smooth, burr-free surface.
2. Apply Lubricant
LUBRICATE
Evenly coat the entire sealing ring with sealing ring lubricant.
Purpose: Ensure full coverage and remove all dust or particles to maintain seal integrity.
›
Clean the sealing ring with a lint-free cloth before application. Apply a thin, even layer only.
3. Install Cover & Pressure Plate
ASSEMBLE
Place the sealing ring, then put on the chamber cover. Install the pressure plate on top.
Purpose: Ensures optimal sealing and extends the service life of the cover.
›
Tighten pressure plate screws in a diagonal pattern to distribute pressure evenly.
4. Secure Feed-Through Screws
FASTEN
Screw in the feed-through screws. Thread-locking adhesive is recommended to prevent loosening.
Purpose: Prevents screws from loosening due to vibration or long-term use.
›
Use medium-strength thread locker (e.g., Loctite 243). Apply to 2–3 threads per screw.
5. Press Fit the Sealing Ring
FINAL
Fit the sealing ring and press it evenly into the acrylic tube until fully seated.
Purpose: Ensures the sealing ring is fully seated, creating a reliable seal.
›
Use a pressing tool or a soft-faced mallet if needed. Never use metal tools directly on the tube wall.
1 / 5
Final Installation Checklist
- Sealing ring seated evenly with no twisting
- Lubricant applied uniformly, free of particles
- Cover and pressure plate secured without play
- Feed-through screws treated with thread locker
- Sealing ring fully pressed into acrylic tube
